Monday, June 27, 2011

Paper Star Decoration

I was feeling crafty tonight but didn't want anything super complicated. I had found this cute idea from The Lovely Residence on how to make a paper star decoration while on Pinterest.

I didn't take a picture of my supplies but the blog that I used has more details on how to make it. 


All you need is :
6 double sided square pieces of paper. I used 12x12in paper 
Stapler
Scotch Tape
Scissors
Ruler
Ribbon to hang it. 

From the other blog she offered measurements for where to draw the lines to cut the paper.. but I used the width of my ruler to make it simpler.
I decided to take a picture of each set that I made. You staple the little side to the large side of the other.


All done! 

 Stapling the center together was a little difficult but I figured out a way to make it work. 

 This is a little large for the front door.. but I found it a home in my room. 

I wanted to put a candle sconce here.. but this adds so much more color. :) 

The whole thing took me about an hour or so to make. 

I'm thinking smaller ones would make cute decor for a classroom, wedding reception, baby shower, bridal shower, etc.

Sunday, June 5, 2011

River Rock Garden Labels

I recently joined this awesome website called Pinterest. It is the best way to waste some time! I have my mom on the site now too.. While searching one day, she came across this idea from Lu Bird Baby .


 Here's the supplies that were used:
Large, smooth river rocks that were purchased from Michael's and Home Depot.
Sharpies

Some are for memorials in the garden. 


 These are to label the different vegetables that we have planted.

Friday, June 3, 2011

Seashell Candles

Today's entry comes from my dear friend, Tessa. She has her own blog that you should check out here. She makes some of the best cupcakes ever! She showed me some of these that she had made and I thought it was a wonderful idea to showcase the seashells from her vacation..

I recently took a trip to Florida. Naturally, I came back with A LOT of shells. I knew both my mother and sister would appreciate me bringing them shells back. After I got home, I started looking at these three small ziplock bags full of shells and realized... what kind of presentation is that!? "Oh, here ya go. Yeah, just a ziplock bag full of shells. Not sure what you'll do with that but hey, it's shells!" Yeah... I didn't like that. So, I randomly had this idea to create a few candles out of them. This isn't the first time I've done candles like this. Here are a couple I still have at home:


Ignore the dust on that second one. But anyways, I decided to do something similar to those with these seashells I came back with. Here's everything I used:


First step is to evenly distribute the send into the three different bowls:


Next, I put in the candle, turning it to go into the sand:

I then started putting seashells into the candle holder, starting near the candle and working my way out.

First Layer
Second Layer

Third Layer
I then tied a ribbon around the top of the candle holder:

On the back, I wrote what beach I got it from. =)


Free Counter For site


Visitors Counter

Wednesday, June 1, 2011

Retirement Sign

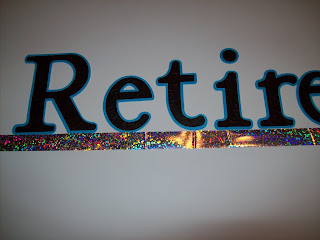
A coworker asked me to make a sign for a woman in her department that is retiring. Of course, I agreed. Finally, a reason to use my new Expression that I got for Christmas! She bought a foam board for me to make the sign on. She wanted black letters on the white board.. Now that just seemed a little too plain for me so I jazzed it up. I used a bluish paper to shadow the black letters for the sign. I left the sign very plain since she wanted room for everyone to sign it at work. 

I'm not a very straight person so it worried me to make the sign on the foam without ghost lines. I thought of penciling lines on but that never fully erases or it will smear. I was just laying out the letters to get a feel for what I wanted when my mom suggested using a piece of ribbon as a guide.. Genius idea!!

 I used the Cricut Classic Font cartridge for the letters. 


 I used a yard stick to help make sure the letters were spaced out pretty equally. I also used it to make sure that my ribbon was taped straight too.

 The completed sign. The "8" in the date is closer than I wanted. It was almost 4am by the time I got to this point and once I put it down, I couldn't slide it at all! 

I embossed the black letters using the Divine Swirls embossing folder to make it pretty too.